How To Clean A Pressure Washer’s Carburetor
Learning how to properly maintain the variety of parts that make up a pressure washer is imperative to prolonging the lifespan of your machine(s).
One of the most important parts of a pressure washer is definitely the carburetor. Ensuring that it is always functioning properly is essential to the proper functioning of the entire machine.
The carburetor on your pressure washer is designed to ensure that the machine maintains an acceptable air to fuel ratio, which will guarantee optimal functionality.
The ideal air to fuel ratio is found somewhere in between 12:1 and 15:1. Maintaining this range is the pressure washer carburetor’s most important job, as a malfunctioning carburetor can lead to the machine consuming way more fuel than necessary.
Your carburetor is essentially the heart of the pressure washing unit that keeps the air and fuel pumping synchronously.
A frequently used pressure washer may experience carburetor issues which should be dealt with immediately if possible. Let’s discuss how to clean a pressure washer’s carburetor when the need arises.
Signs That Your Carburetor Needs Cleaning
When it comes time to clean your pressure washer’s carburetor, you will be able to identify a number of abnormalities that indicate the need for maintenance.
Here are a few of the main signs that your carburetor needs cleaning.
Startup Failure
When your carburetor needs a cleaning, you will start to notice that the pressure washer is requiring more effort to get started. In more severe cases, the machine may not start at all!
When a carburetor gets clogged or stops functioning for some other reason, air and fuel will not pass through it properly, which will cause problems with starting. If you begin to experience this sort of issue, check the state of your pressure washer’s carburetor as it will often be the source of the problem.
Abnormal Sounds
One of the most obvious signs that your carburetor needs cleaning is the development of popping and “sneezing” sounds when the pressure washer is running.
These sounds are often an indication that there is some sort of imbalance occurring in the air and fuel mixture. This will cause fuel flow issues within the carburetor.
If you start to hear abnormal sounds coming from your pressure washer, there is a good chance your carburetor needs to be cleaned!
Black Smoke
Another important sign to look out for that indicates the need for some carburetor maintenance is the emission of black smoke from your pressure washer.
This will often indicate an imbalance in the fuel to air ratio, in which more fuel is going through the combustion chamber than is intended.
When there is more fuel circulating than the machine is designed to process, it can lead to the production of black smoke. If you see this, check on the state of your carburetor!
Step-By-Step Guide To Cleaning Your Carburetor
Properly cleaning your pressure washer’s carburetor can actually be a relatively challenging task, especially for people who do not have any experience with the process.
Luckily, we will provide a step-by-step guide to cleaning your carburetor properly.
Step 1: Turn Off The Fuel Valve
Before you do anything, you should remove the spark plug cap and turn off the fuel valve to ensure that no fuel will pass through the carburetor.
Step 2: Acces The Carburetor
Next, find and access the carburetor on your machine. In many cases you will have to take off the throttle cover, intake apparatus, and the air filter box in order to get at your carburetor.
Step 3: Empty The Gas Tank
Locate the gas line that connects the carburetor and the fuel tank and empty any gas that is still present. Remove the tube from the nipple of the carburetor and drain the gas into a container of some sort.
Step 4: Remove The Carburetor
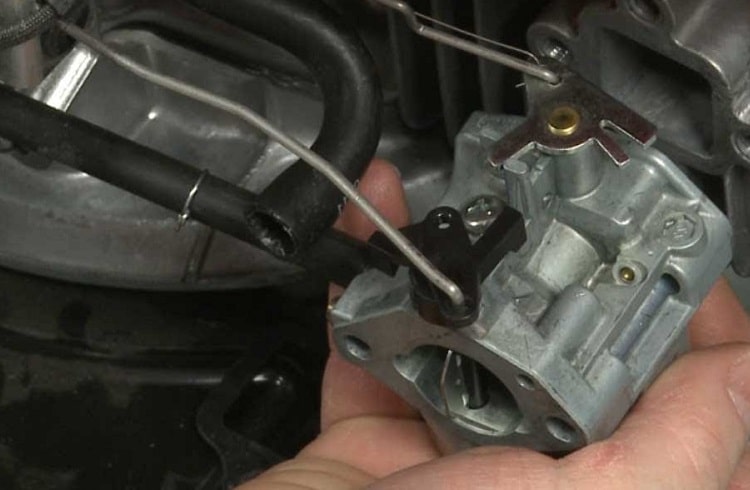
Next, using a nut driver or socket wrench, remove the carburetor from your pressure washer’s engine. Unscrew the two bolts that connect the carburetor to the engine, and then disconnect the throttle cable from the carburetor linkage.
Step 5: Remove Residual Gas
Check the carburetor unit for any residual fuel left over and drop it in a container. Next, you need to check whether there is any corrosion, grime or dirt present. If there is excessive corrosion, you may need to replace the carburetor, depending on the state.
Step 6: Take The Carburetor Apart
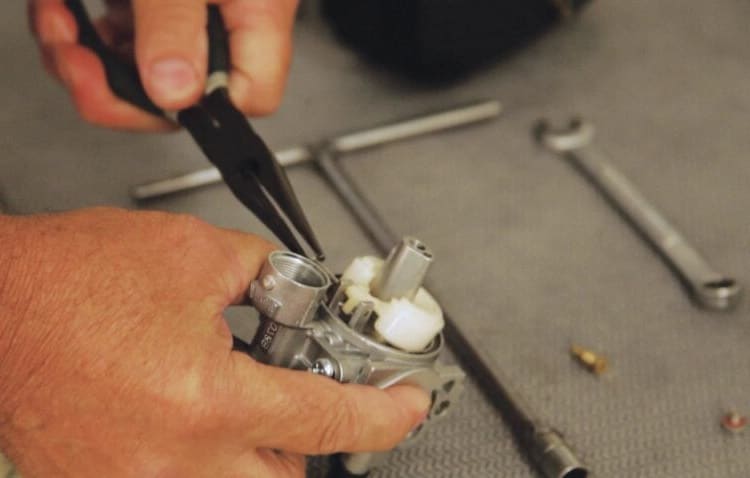
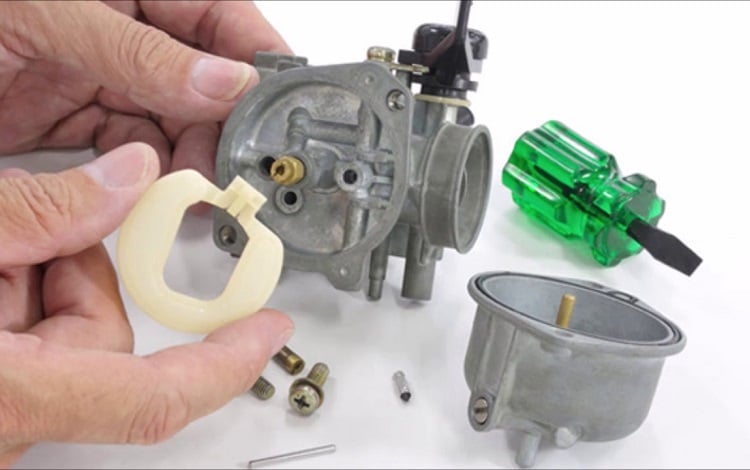
This is a great time to take a picture of how the carburetor is put together, in case you need to refer back to it at the end. Unscrew the bottom of the unit and remove the carburetor bowl. Take the other pieces apart in order and remember your steps!
Step 7: Apply The Carburetor Cleaner
At this point the bulk of the dirt and grime should have been removed. You can now proceed by spraying the parts that need further attention with your cleaner.
Keep in mind that rubber parts may be affected by harsh cleaners – soap and water will often do the job. Thoroughly rinse every part and then allow them to dry.
Step 8: Reassemble
Now that you have everything properly cleaned and dried, the final step is to put the carburetor back together. This is where your picture from before will come in handy. Recall the order in which you took everything apart and repeat this process in reverse!
Conclusion
The carburetor is like the heart of a pressure washer. If it isn’t functioning properly, air and fuel will not circulate properly, which can cause a variety of issues.
We have covered some of the main signs that indicate the need to maintain your carburetor, and also provided a step-by-step guide that outlines how to clean a pressure washer’s carburetor.
Take this information and advice and use it to ensure that your pressure washing endeavors are not hindered by a malfunctioning carburetor.




![[Solution] My Pressure Washer Loses Pressure When the Trigger is Pulled](https://pressurewashr.com/wp-content/uploads/2021/06/Losing-Pressure-Thumb-768x453.png)
